
 This paper discusses a technique that uses off-the-shelf rendering software to generate 24-bit normal maps from 3-D models to produce bump effects that are far superior to conventional 8-bit gray scale bump maps for lighting and reflective effects. By Dave McCoy, Graphics Techniques Consultant, Xbox Content and Design Team
Downloadable files for Discreet 3DMAX, Alias/Wavefront Maya, and Newtek Lightwave that have the appropriate material and lighting settings are available at the end of this article.
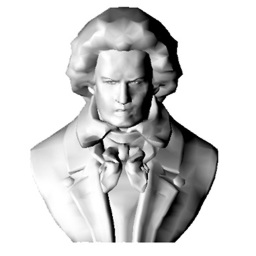
This technique was developed after a brainstorming dialogue with Mark Brenneman of Dynamix, and I am indebted to him for his contribution to this article. Elevation Maps Typically, bump maps are generated by creating 8-bit gray scale images, often referred to as elevation maps. In these gray scale images, white represents the most elevated features, and black, the most recessed ones. An 8-bit gray scale can represent 256 levels. Here a Beethoven bust is represented with an elevation map.
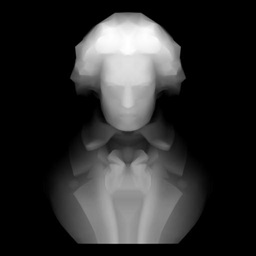
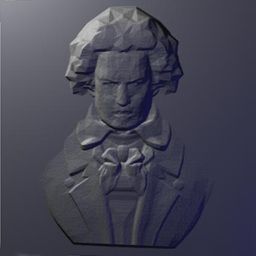
When this map is applied to a quad as a bump map, it can simulate a bas-relief.
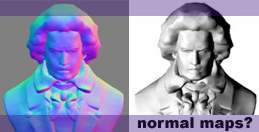
Elevation maps are limited in the kind of surfaces they can represent. Often, surfaces that are highly edge on do not render very accurately, which subdues the level of apparent elevation. The limitations of 256 levels of height can also introduce a terraced or grainy appearance to surfaces, and smooth surfaces and sudden angle changes do not reproduce well. Normal Maps To produce lighting effects, elevation maps are converted into normal maps. Rather than representing elevations, normal maps represent the normal of the surface at each pixel in the map. Just as normals are used to calculate lighting and reflections on actual geometry, normal maps can be used to determine at what angle light strikes a surface or what angle should be used in calculating reflections. To represent these normals, a normal map uses a 24-bit image in which different colors represent different directions.
Here is a normal map for the Beethoven bust.
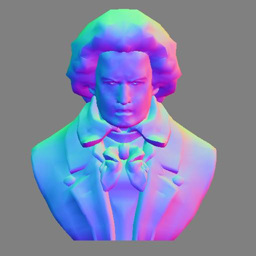
Applying this normal map to a quad allows for a much higher quality bump effect than is achievable with an elevation map.
Here is a quad with the Beethoven normal map applied to it.
Notice that the overall appearance of the object is smoother and more dimensional than that created with an elevation map. This is due partially to the 8-bit resolution of an elevation map versus the 24-bit precision of a normal map; however, it is also due to inevitable artifacts introduced by the per-pixel conversion approach used by existing elevation to normal map converters and the ability of normal maps to handle sudden changes in surface orientation.
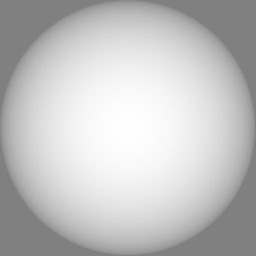
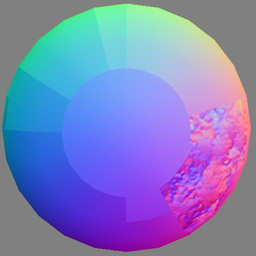
In this normal map for a sphere, red ranges from 255 at the far right to 0 at the left. From top to bottom, green ranges from 255 to 0. From the center of the hemisphere to the outside edge, blue ranges from 255 to 128.
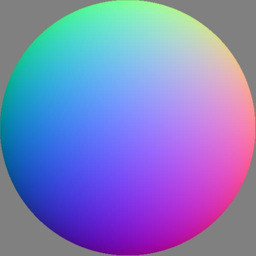
RGB
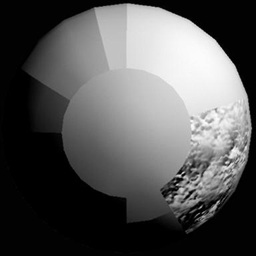
This can be seen clearly if the separate red green and blue channels of the map are examined individually:
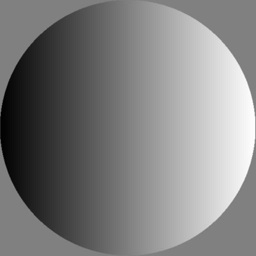
RED
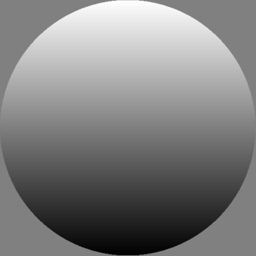
GREEN
BLUE
While the individual channels are very similar to a conventionally lit sphere, there are important differences.
Fortunately, a simple technique generates a very accurate normal map from a 3-D model. If you want to start with an elevation map rather than a 3-D model, you can apply the elevation map to a mesh as a deformation map or even map it onto a quad as a bump map and use this technique, with some limitations. Generating a Normal Map Through the use of appropriate ambient levels, material settings, and the use of negative intensity lights, normal maps can be created for any 3-D object with rendering software such as 3D MAX, Maya, Lightwave, and Avid SoftImage. This technique was used to create the sphere and Beethoven normal maps seen above.
To render an image that captures 3-D information for a normal map, set the ambient level to 50 percent using material or lighting settings, depending on the package used. Place a pure red light to the right of the object and a pure green light above it. Place a negative intensity pure red light to the left of the object and a negative intensity pure green light below it. Place a pure blue light directly ahead of the object. No negative blue light is required because we will be creating the image along this axis and we can’t see the back of the object.
The following diagram shows the lighting setup:

The object material should be set to white and all specular attributes should be set to zero so that only diffuse light is considered in the rendering. Due to some differences in light modeling, it is necessary to use different light, ambient, and surface characteristics to get the correct results in each package. I used Blinn lighting in MAX, and Lambert lighting in Maya, though other lighting models available in these packages may also work.
The object is rendered from the front isometric window or with a high zoom setting on a distant camera placed in front of the object when using software that does not allow isometric viewport rendering.
The background should be set to 50 percent gray. This is the value used to represent a zero normal in normal maps. You may also want to render an alpha map at the same time you create the normal map.
In addition to producing very high quality normal maps, this technique allows a number of effects that are not readily achievable using other methods for normal map creation. For example, smoothing groups can be used to create smoothed or sharp edges, something not possible with elevation maps. Additionally, you can apply procedural and drawn bump maps to surfaces, and the results will be identical to their appearance in your rendering package.
Hopefully this technique will help artists to fully exploit additional per-pixel lighting and reflection mapping effects available on the Xbox™ video game system from Microsoft.
The appropriate material and lighting settings for the normal map technique described in this paper are available for download.
MAX users download the MAX scene file normsphere3.max.
Maya users download the scene file NormalSphere.mb.
Lightwave users download the scene file Normalball.lws and the object file Whiteball.lwo.

